How to Upscale Anime Images to 4K Offline Without Ruining Line Art
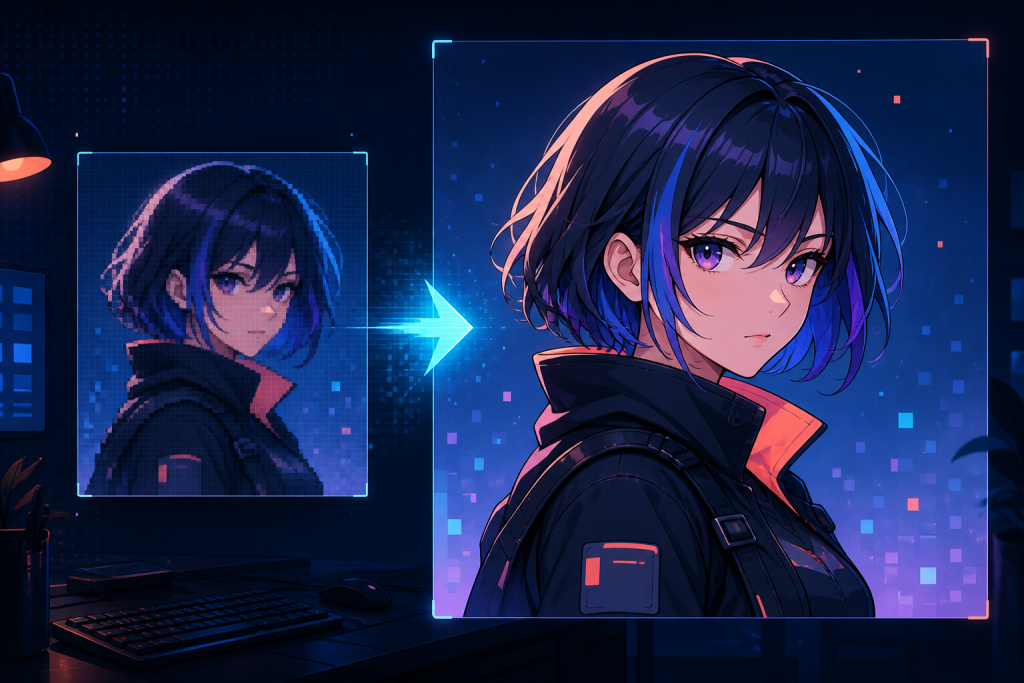
Upscaling anime artwork is not the same as enlarging a photograph. Anime images depend on clean outlines, flat colour regions, small facial details, and intentional gradients. A general photo upscaler may invent skin texture, soften ink lines, or turn eyelashes into noisy edges. The safest workflow uses a model trained for illustrations, starts with a moderate scale, and checks the details that viewers notice first.
This guide explains how to upscale anime images to 4K offline while protecting line art. It works for wallpapers, original character art, visual-novel assets, and animation stills. Always use artwork you own or have permission to process.
Quick answer
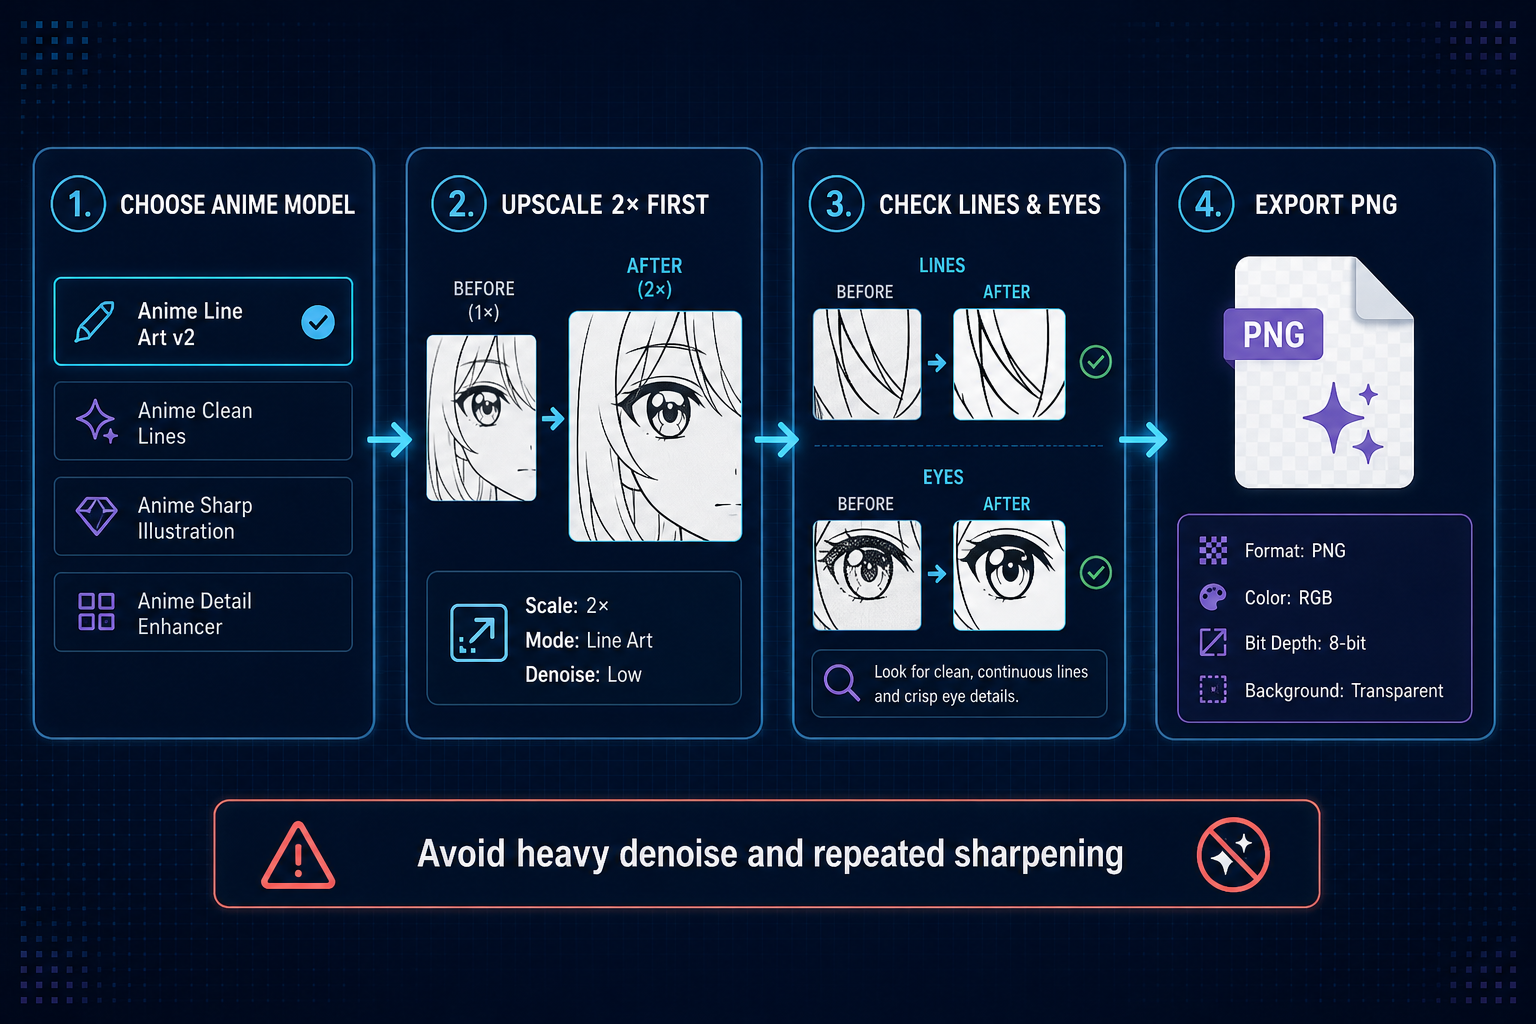
Choose an anime or illustration model, upscale by 2× before attempting 4×, keep denoise low, and compare the result at 100% zoom. Inspect eyes, hair strands, mouth lines, gradients, and any text. Export to PNG when you need lossless edges or transparency. If the source is badly compressed, clean it once before upscaling instead of stacking several aggressive enhancement passes.
Why anime line art breaks during normal resizing
Traditional bicubic enlargement estimates new pixels from nearby colours. It is fast, but thin black lines often become grey or soft. AI upscalers can rebuild edges more convincingly, yet a model trained mainly on photographs may add details that do not belong in an illustration.
The risk is highest around eyelashes, hair tips, noses, fingers, clothing seams, and small typography. Flat colour areas can also develop speckled texture. The goal is not to make every region more detailed; it is to preserve the artist’s visual hierarchy at a larger resolution.
Choose the right model and scale
| Source | Best starting model | Starting scale | Main check |
|---|---|---|---|
| Clean digital anime art | Anime or illustration | 2× | Line continuity |
| Compressed screenshot | Anime model with light cleanup | 2× | Halos and blocks |
| Painted anime artwork | General illustration | 2× | Gradient texture |
| Pixel-art character | Nearest-neighbour first | Integer scale | Pixel geometry |
| Already large artwork | Anime model, low strength | Only what is needed | Unwanted invention |
A 4× model is not automatically better than two careful 2× decisions. If a 1280 × 720 image only needs to fill a 3840 × 2160 display, a 3× target is mathematically enough. Generating pixels beyond the destination and resizing back down can make lines look overprocessed.
How to upscale anime images to 4K offline
1. Preserve the original file
Work on a copy. Keep the original resolution, colour profile, transparency, and file format available for comparison. Avoid beginning with an image that has already been repeatedly saved as a low-quality JPEG.
2. Calculate the required output size
“4K” usually means 3840 × 2160 for a landscape display, but the correct dimensions depend on aspect ratio. Do not stretch a portrait or ultrawide image to 16:9. Scale proportionally, then crop or add background space only if the destination requires it.
3. Select an anime-specific model
Start with a model labelled for anime, drawings, or line art. These models are generally better at keeping boundaries crisp and flat regions smooth. A photo model can still help with painterly backgrounds, but test it separately rather than applying it to the whole image without comparison.
4. Keep denoise conservative
Denoise can remove JPEG blocks, but it can also erase intentional texture and thin strokes. Use the lowest setting that fixes the visible problem. If the source is clean, turn cleanup down or off. Sharpening should also be restrained; dark halos around hair and clothing are difficult to hide later.
5. Run a 2× test first
Process one representative image before starting a folder. A 2× preview reveals whether the model understands the artwork without committing to a large batch. Compare it with the original at the same displayed size as well as at 100% zoom.
6. Inspect high-risk details
Zoom into both eyes, the mouth, fine hair strands, fingers, jewellery, text, and repeated patterns. Look for doubled outlines, broken curves, asymmetrical pupils, invented eyelashes, and checkerboard artefacts around transparency. Also inspect large gradients at normal viewing size, where banding is easier to notice.
7. Produce the final size
If the 2× result is clean, generate the scale needed for the destination. Avoid feeding an AI-upscaled result through several different models unless there is a specific defect to correct. Each pass can move the image farther from the source.
8. Export without throwing quality away
Use PNG for line art, transparent assets, or images that will be edited again. High-quality JPEG or WebP can be appropriate for a finished wallpaper when file size matters, but compare edges and gradients before deleting the lossless version. Preserve transparency instead of flattening it onto an accidental black or white background.
Common problems and practical fixes
- Waxy faces: switch from a photo model to an anime model and lower denoise.
- Dark halos: reduce sharpening and avoid repeated enhancement passes.
- Broken hair lines: try a lower scale or a line-art-focused model.
- Noisy flat colours: disable texture enhancement and compare PNG output.
- Altered text: replace small typography manually after upscaling.
- Banding in skies: retain a higher-quality source and avoid aggressive compression.
- Jagged transparency: export PNG and inspect the alpha edge over light and dark backgrounds.
How to judge whether the upscale is actually better
Do not judge only by file dimensions. A useful upscale should hold up at the intended viewing distance, preserve the original expression and design, and avoid new artefacts. Compare three views: the original at native size, both files fitted to the same screen area, and 100% crops of sensitive details.
A larger result can look impressive in isolation while being less faithful. When two outputs are close, prefer the one with cleaner continuous lines and fewer invented details. Slight softness is usually easier to accept than a sharp but incorrect eye or mouth.
Batch-upscaling a folder safely
Once one image passes inspection, test five varied files: a face close-up, a dark scene, a bright scene, an image with text, and an image with a detailed background. Use the same settings only if all five remain stable. Save results to a new folder, keep filenames predictable, and review failures before processing hundreds of images.
Offline processing is especially useful for unpublished artwork because the files stay on the computer. It also makes large batches easier to repeat, but local processing does not remove the need for backups or permission from the rights holder.
Frequently asked questions
Should I use 2× or 4× for anime art?
Use the smallest scale that reaches the final dimensions. Start with 2× to evaluate the model. Choose 4× only when the source and destination genuinely require it.
Is PNG always better than JPEG?
PNG is safer for line art, transparency, and future editing. A carefully encoded JPEG or WebP can be smaller for a final wallpaper, but it may introduce blocks or ringing around sharp outlines.
Can AI restore missing detail from a tiny image?
It can create plausible detail, not recover information that no longer exists. Treat major facial or design changes as generated interpretation and compare them closely with the original.
Does offline upscaling need a powerful GPU?
A compatible GPU speeds up processing, particularly for 4× jobs and batches. Smaller images can often run on a CPU, but processing will take longer and memory limits may require tiled processing.
Final checklist
- Use artwork you own or have permission to process.
- Keep an untouched original.
- Match the output to the real destination size.
- Start with an anime or line-art model.
- Test 2× before 4×.
- Keep denoise and sharpening conservative.
- Inspect eyes, hair, mouth, text, gradients, and transparency.
- Export PNG when edge quality or alpha matters.
AI Image Upscaler provides local model options for private image enlargement on Windows. For Mac workflows, see AI Image Upscaler Pro for Mac. Test one image first and keep the most faithful result—not merely the sharpest one.

Writes guides and product notes for Bytesweavers.