How to Turn a Product Photo Into a 3D Model for a Web Viewer
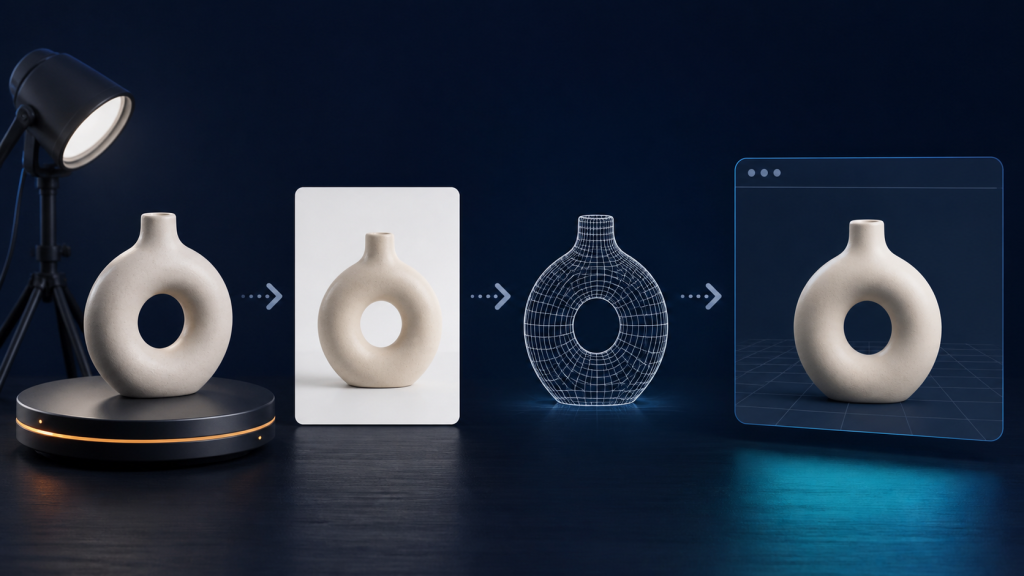
A product photo can be enough to create a useful 3D draft for a website, but it is not magic. A single image shows only one view, so the back, underside, and hidden parts must be estimated. The goal is therefore not to promise a perfect catalogue model from one click. The goal is to prepare a clean reference, generate a sensible mesh, inspect what the image could not show, and export a lightweight asset that works in a browser.
This workflow is a good fit for a simple object such as a bottle, chair, lamp, package, or small tool. It is less suitable for transparent materials, reflective chrome, tangled cables, soft fabric, or products whose important details are hidden from the camera.
What you need before generating the model
Start with one clear product image and a specific destination. A web viewer usually needs a compact GLB file, while a design handoff may need more editable geometry and separate textures. Decide which matters before you process the image.
- Object: choose one item with a recognisable silhouette and limited occlusion.
- Background: use a plain, contrasting background so the object edge is easy to separate.
- Framing: leave a little space around the object and avoid cropping the base or top.
- Lighting: use soft, even light; hard shadows can be mistaken for geometry.
- Destination: decide whether the result is a visual draft, a product preview, or a production asset.
Keep the original image untouched. Make a working copy if you need to remove a background or correct exposure. That gives you a reference when the generated model makes an uncertain decision.
Prepare the reference image
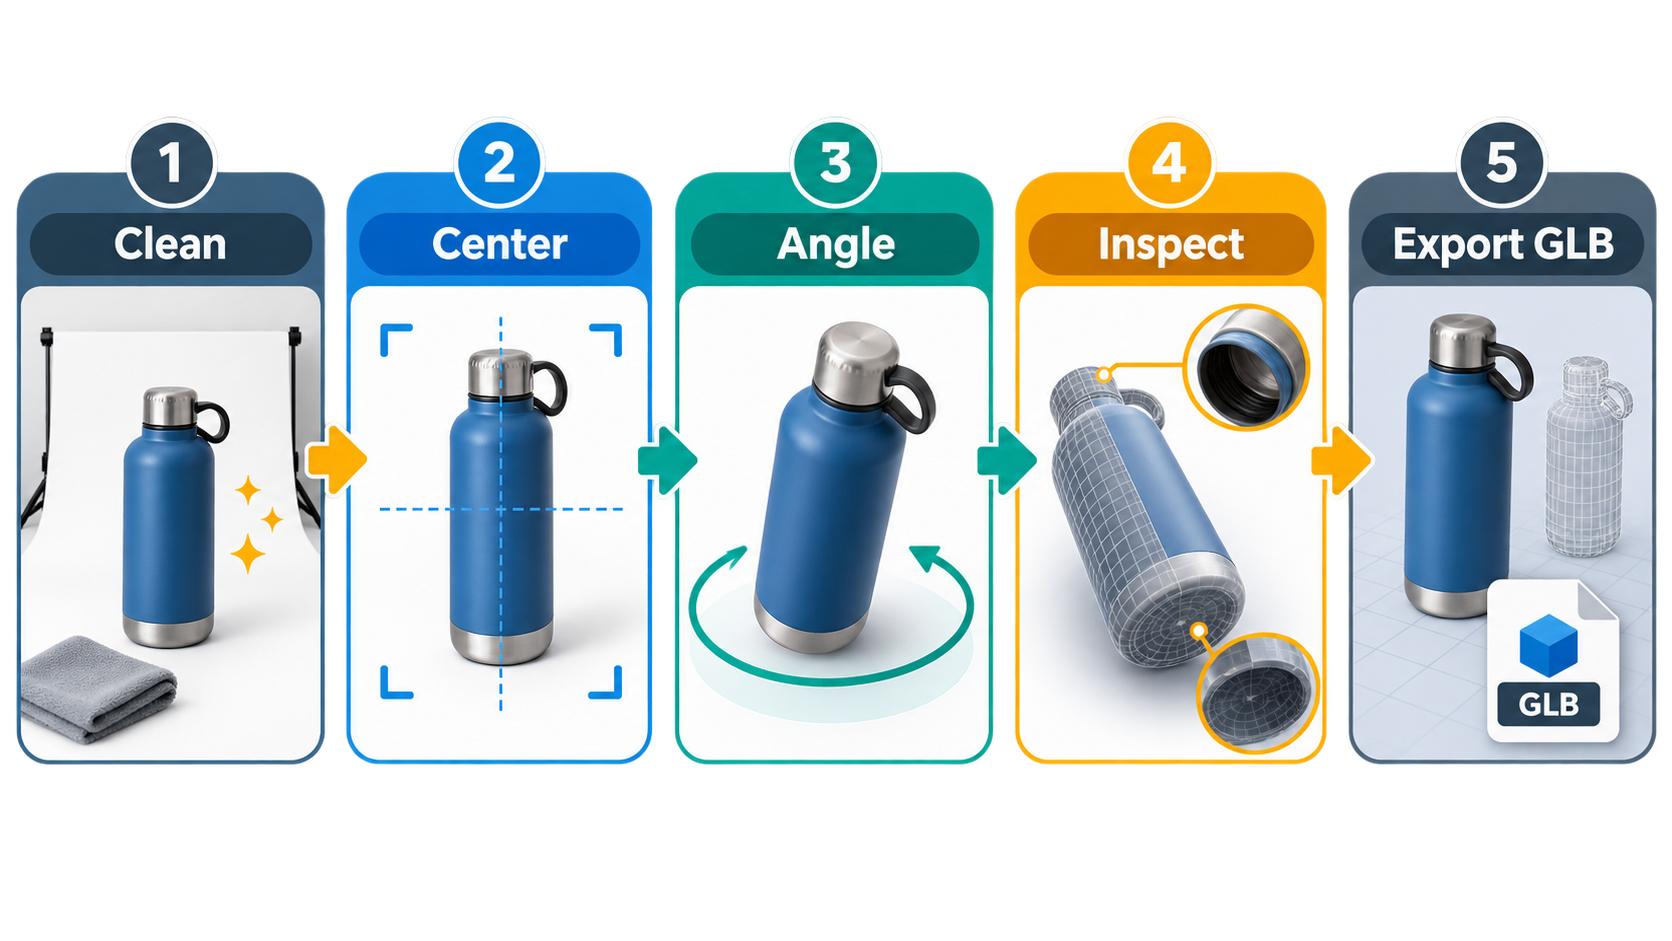
Clean the background without erasing thin parts such as handles, straps, or narrow legs. Centre the object vertically and horizontally, but do not flatten its natural perspective. A front-facing object with a little visible depth is usually more useful than an extreme close-up.
Check the edges at full size. A halo around the object may appear as a second surface in the generated mesh. Likewise, a strong cast shadow can become a dark bump or an unwanted extension. If you remove the shadow, keep enough contact information that the base still looks grounded.
Generate a first-pass 3D model
Upload the prepared reference to an image-to-3D workflow and select the output that matches your destination. If the tool offers quality, detail, or polygon controls, begin with a moderate setting. A very dense first result slows down inspection and does not guarantee better hidden surfaces.
Give the object a useful name and record the input image, model setting, and date. This small bit of provenance matters when you need to regenerate the model after fixing the reference. It also helps you compare two outputs fairly instead of relying on memory.
A one-image result should be treated as a draft. The visible front may be convincing while the back is generic, the underside may be closed incorrectly, and small text may be unreadable. Those are normal limits of the input, not problems an export setting can solve.
Inspect the mesh from every important angle
Rotate the model slowly before adding it to a website. Check the silhouette first, then inspect the following areas:
- Back and underside: look for flat patches, holes, or invented parts.
- Thin features: check handles, rims, straps, buttons, and legs for stretching.
- Openings: confirm that holes and recessed areas are actually modelled, not painted dark.
- Material boundaries: look for texture seams and colours that wrap around the wrong side.
- Scale and pivot: verify that the object sits on the ground and rotates around a sensible centre.
If the model will appear beside other products, compare its scale and camera angle with those objects. A visually correct mesh can still look wrong when its pivot, height, or lighting does not match the rest of the page.
Fix the result before exporting
Make small corrections first. Remove floating fragments, close obvious holes, smooth a harsh edge, and fix the pivot. Avoid adding detail to a surface that the source image never showed; a confident-looking guess can be harder to spot later than a deliberately simple surface.
Reduce unnecessary polygons while preserving the silhouette. Then check the texture size and image format. A web visitor benefits more from a stable, compact model with a clean silhouette than from a huge file containing invisible detail.
Why GLB is usually a practical web export
GLB packages the mesh, materials, and textures into one portable file. That makes it convenient for a web viewer and reduces the chance of a page losing a separate texture path. It is still worth checking the final file size and whether the viewer supports the material features you used.
Use a descriptive filename such as blue-bottle-product-preview.glb. Keep the original generated file and the web-optimised copy separate so you can return to the higher-detail version if the product page later needs it.
Test the model in an actual browser viewer
A model can look fine in a desktop editor and fail in a page. Open the exported GLB in the same kind of viewer your visitors will use. Test a phone-sized viewport as well as a desktop screen, and rotate the object through a full turn.
- Does the model load without a missing-texture warning?
- Does it remain centred when the viewer resizes?
- Is the first view useful without forcing the user to drag?
- Does the file load quickly on an ordinary connection?
- Do shadows and reflections hide important details?
For a product preview, add a short text description and accessible fallback image. The 3D object should add confidence, not become the only way to understand what the product is.
When one photo is not enough
Use more views when the back matters, the product has a complex underside, or the shape is symmetrical in a way the model could misread. A second or third reference angle can resolve ambiguity that no amount of texture editing can fix.
For a quick local workflow, an image-to-3D generator can create the first draft, while a website development workflow can handle the viewer, loading state, fallback image, and responsive layout. Keep the roles separate: generation creates an asset, and the web page makes that asset usable.
The dependable sequence is simple: choose a suitable object, prepare a clean reference, generate a moderate first pass, inspect hidden surfaces, simplify the mesh, export GLB, and test it in the browser. That process produces a useful web-viewable 3D draft while keeping the limitations of a single product photo visible.

Writes guides and product notes for Bytesweavers.