How to Batch Compress Photos on Android Without Losing EXIF Data

Phone photos are convenient until a folder of them starts eating storage. Compression can help, but a smaller file is not automatically a better result. Some apps strip the EXIF data that tells you when a photo was taken, which camera made it, and sometimes where it was captured.
This guide shows a safe way to batch-compress photos on Android while keeping the metadata you still need. The goal is simple: make a copy, reduce the image size, compare the results, and keep the originals until the check is complete.
What EXIF data contains
EXIF is metadata stored inside many image files. It can include the capture date, camera and lens details, orientation, exposure settings, and GPS coordinates. Android gallery apps may use that information to sort photos or show them on a map.
Not every field needs to survive every workflow. Location data can be sensitive, and you may want to remove it before sharing a photo. The important point is to choose deliberately. Do not assume that a compression setting will preserve or remove metadata in a predictable way.
Start with a safe batch
Do not compress your only copy. Create a test folder with about 100 photos that represent the real mix you care about: portrait and landscape shots, daylight and low light, screenshots if relevant, and a few images with location data. Keep the originals in a separate folder or on a backup drive.
Choose a small sample first. Five to ten photos are enough to catch a bad setting. Once the sample passes, run the same settings on the full batch. This is faster than discovering after a long run that the output has the wrong orientation or no longer sorts by capture date.
Choose the right compression settings
For photos that will stay on a phone or be shared in a chat, start with a moderate quality setting and a long edge around 2,000 to 2,500 pixels. For a large print or later editing, keep more pixels. Avoid resizing everything to a tiny width just to make the storage number look good.
JPEG is usually the practical choice for camera photos. It can shrink a batch substantially, but repeated JPEG saves can add visible artifacts. If the tool offers an option to keep the original file format, use it for PNG screenshots and graphics. Do not convert screenshots to JPEG just because the extension is familiar.
Keep EXIF when the workflow requires it
Look for a setting named something like “preserve metadata,” “keep EXIF,” or “copy photo information.” The wording varies, so test the output instead of trusting the label. If the tool offers separate switches for GPS, capture date, camera details, and orientation, decide each one separately.
A sensible default for a private archive is to keep capture date, camera details, and orientation, while treating GPS as optional. For photos you plan to publish, remove location data if you do not want the file to reveal where it was taken. Preservation and privacy are different decisions.
Run a before-and-after check
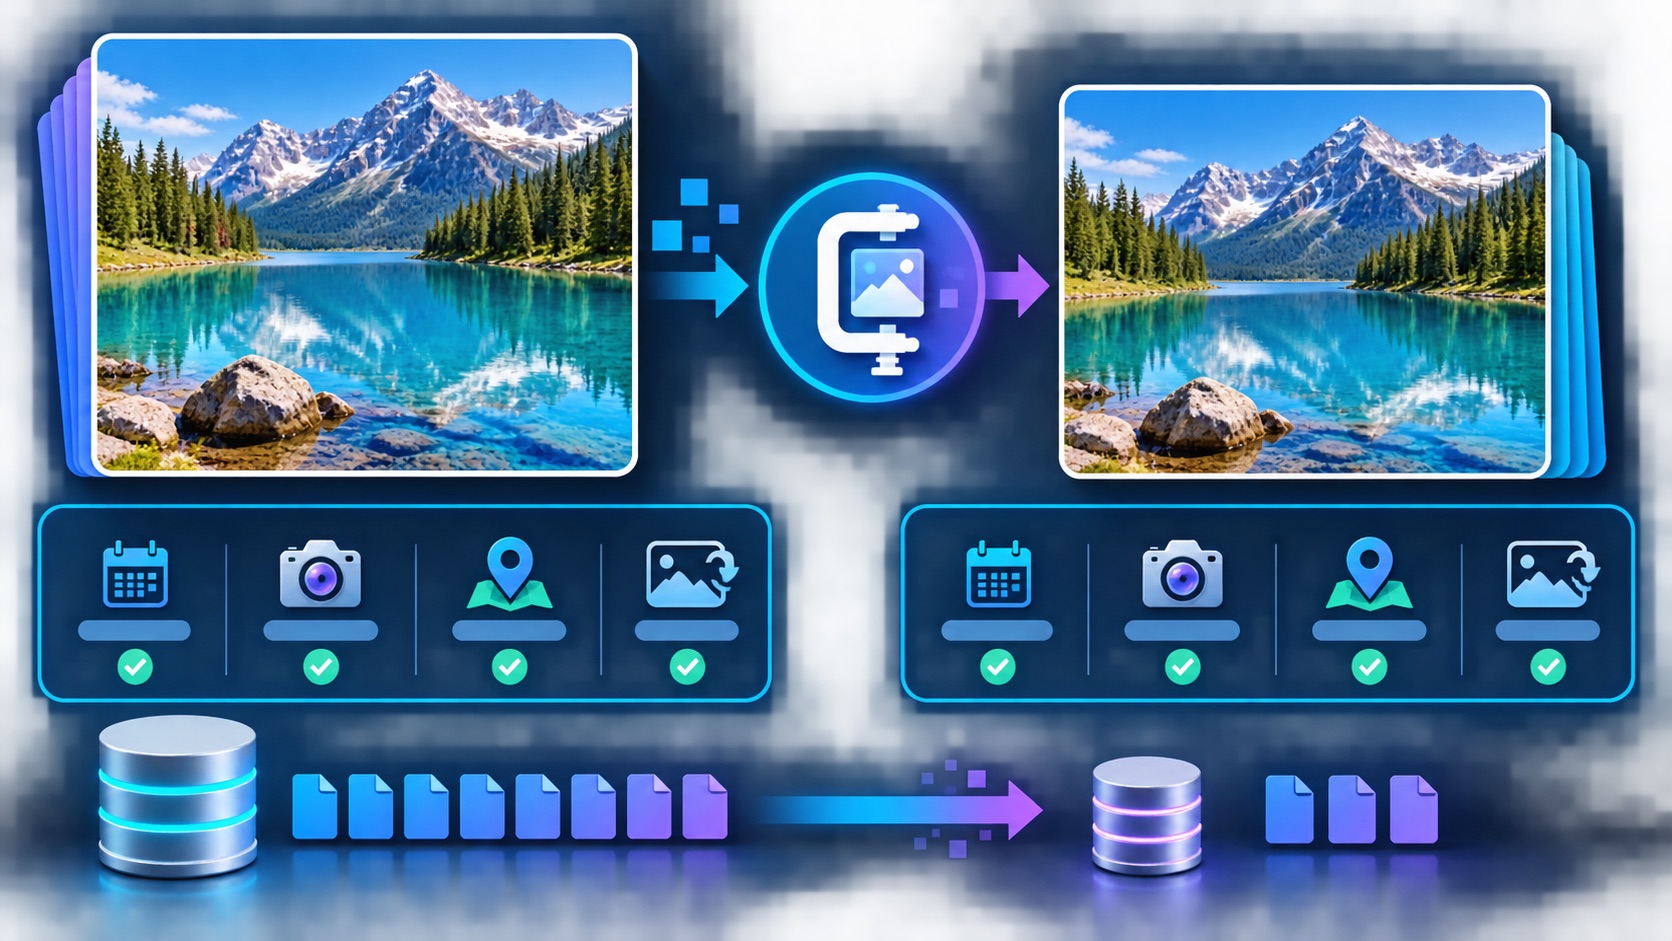
Pick one source photo with known details. Record its file size, pixel dimensions, capture date, camera information, GPS status, and orientation. Then compress a copy and inspect the output in a metadata viewer or a gallery app that exposes file details.
Repeat that check for several different photos. A landscape image may pass while a portrait image loses its orientation flag. A photo with GPS data may behave differently from one without it. Compare the image itself too: look at hair, leaves, text, and dark areas where compression damage is easiest to notice.
Measure a 100-photo batch
Once the sample is good, run a 100-photo test. Before the run, record the total size of the originals. Afterward, record the total size of the compressed copies and count how many outputs still contain the fields you decided to keep. Also check that the output folder has the same number of images as the input folder.
This gives you useful evidence without guessing. You can see the storage saved, the visual trade-off, and whether metadata survived consistently. If one file fails, keep the original and test that photo separately instead of disabling all checks.
Organize outputs and originals
Use a new output folder with a clear name, such as “Photos-compressed-2026-08-16.” Do not write over the source folder during the first run. After verification, you can archive the originals or move them to backup storage, but keep one recoverable copy for photos that matter.
If you use a local batch tool, the files can stay on the device while the operation runs. That is useful for private photos and for large batches where an upload would be slow. An offline image compressor can make the workflow repeatable, but the same checks still apply: confirm the output count, image quality, and metadata fields.
Final checklist
- Keep an untouched copy of the originals.
- Test five to ten representative photos first.
- Choose resolution and quality for the final use, not just the smallest file.
- Decide whether to keep capture date, camera data, orientation, and GPS.
- Compare metadata and image quality after compression.
- Measure the result on a 100-photo batch before scaling up.
For a broader workflow around private image handling, see our image tools collection. The safest compression run is the one you can verify and undo.

Writes guides and product notes for Bytesweavers.