How to Upscale an Image 4x on a Mac Without Uploading It
Almost every “AI upscaler” article follows the same shape: a dramatic before-and-after, a download button, and no settings. That format is why so many people upscale a photo, look at the result at thumbnail size, feel pleased, and then discover a week later that the eyes are wrong and the small print has turned into decoration.
So instead of a before-and-after, here is the whole test. One source image, one model, one export, and the resulting files inspected at 100%. If a claim is not backed by one of the crops below, it is not in this article.
What was actually tested
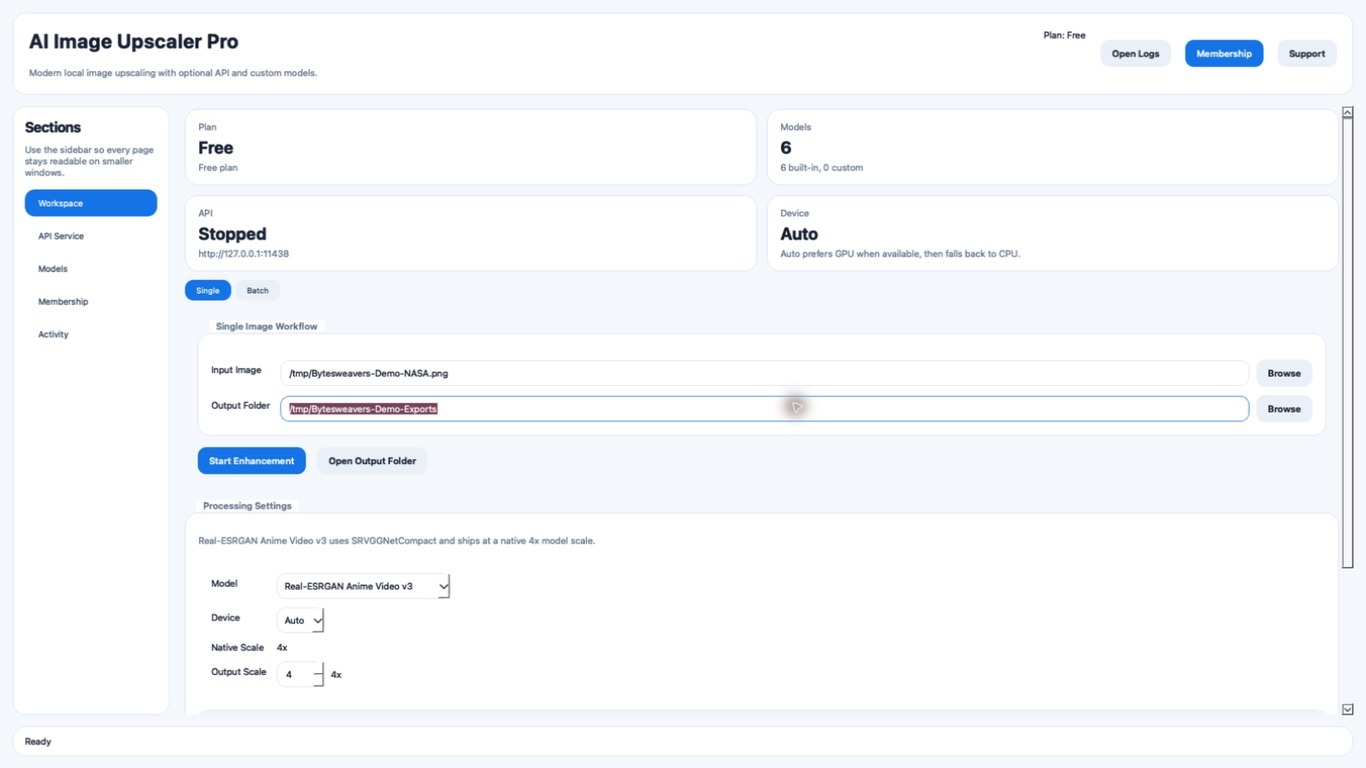
This ran on macOS with a local build of AI Image Upscaler Pro. Two unrelated sources were used on purpose, because a single image proves almost nothing:
- A 512 x 512 portrait that is in the public domain (the NASA portrait of Eileen Collins, distributed with scikit-image).
- A 512 x 512 illustration drawn from scratch for this test, so there are no rights questions about the fixture.
Both were exported at 4x with Real-ESRGAN Anime Video v3, on CPU, into a normal folder on the machine. Both outputs measured 2048 x 2048. The images never left the computer: there was no upload step, no account, and no queue.
One honest caveat up front: this is a local source build, not a claim that the current store binary behaves identically in every configuration. Re-run the same checks on your own machine before you rely on it for paid work.
What the 100% crops actually show
Thumbnails hide everything. Below, the left panel is the 512 px source enlarged so you can compare pixels fairly, and the right panel is the same region of the real 2048 px export.

Two things are worth noticing. First, the edges that were soft in the source are now defined without a hard outline, which is the difference between a resample and a reconstruction. Second, the result is plausible rather than true: the model has estimated skin and fabric texture that was not recorded in the original. That is the entire trade.
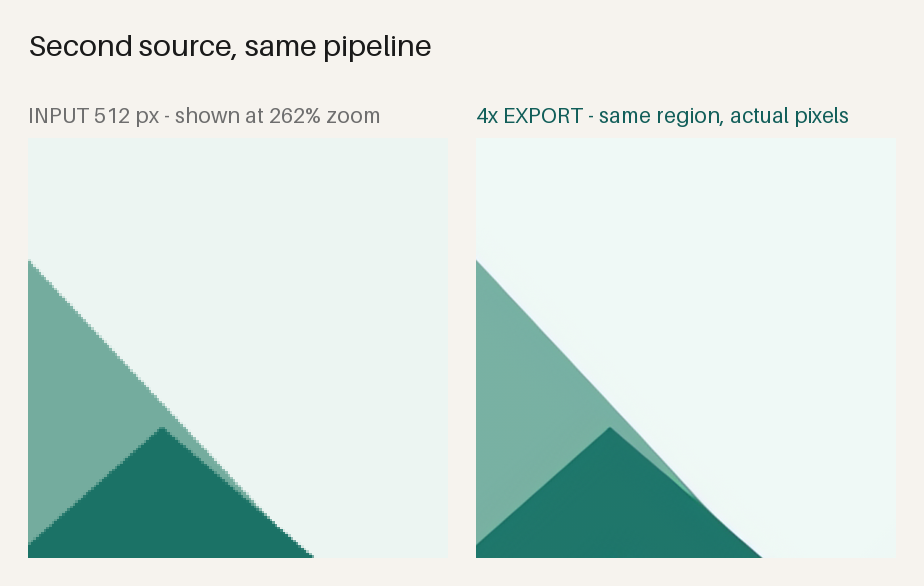
The illustration behaves differently from the portrait. Flat regions stay flat and clean, and line art keeps its edge. This is why testing on your own material matters more than reading a model comparison: the same setting that flatters line art can smooth away real photographic grain.
The four checks that tell you an upscale is usable
- Look at 100%, not at fit-to-window. If you judge the result at thumbnail size you will approve almost anything.
- Audit small text and lettering. Letterforms are the fastest way to spot invented detail. If it is a document or a sign, compare characters one by one.
- Compare the eyes and hairline in a portrait. That is where a model improvises most confidently and most wrongly.
- Check the file, not the preview. Confirm the exported pixel dimensions and open the exported file itself. A preview can be rendered at a different scale from the file you save.
Where this workflow does not help
Upscaling is not recovery. If the original is out of focus, blurred by motion, or heavily compressed, a 4x export will produce a larger, smoother version of the same problem. Cropping a small region from a phone photo and upscaling it is a normal, legitimate use; expecting it to recreate information that the sensor never recorded is not.
Treat every AI upscale as a draft. Keep the source file. Re-inspect the export at 100% before it goes into a print run, a product listing, or a client delivery, and say plainly that the detail was estimated if someone will make a decision based on it.
The workflow, start to finish
- Choose the source image and set an output folder you will actually check.
- Pick a model. Start with the default rather than the most aggressive option.
- Choose the scale. 4x is the common case; smaller factors are usually enough for print at a modest size.
- Export, then open the exported file and run the four checks above.
- If a face or a document fails the audit, change the model or work from a better source. Do not accept a confident-looking wrong result.
The reason this is worth doing on a Mac locally is unglamorous: a local pass has no upload, no per-image credit, and no queue, so you can re-run a difficult crop five times while you compare models.
Build and test record
- Platform: macOS, local build of AI Image Upscaler Pro (version 1.0.0 source build).
- Model: Real-ESRGAN Anime Video v3, CPU.
- Sources: public-domain 512 x 512 portrait; original 512 x 512 illustration.
- Exports: 2048 x 2048, inspected at 100% and kept unretouched for this article.
- Claims about pricing, licensing, telemetry or “free” limits are deliberately omitted; check the current listing for those.
If you want to try the same workflow without a subscription, AI Image Upscaler Pro for Mac is one of the offline tools we make. The steps above are the same ones we use to check it.

Writes guides and product notes for Bytesweavers.