
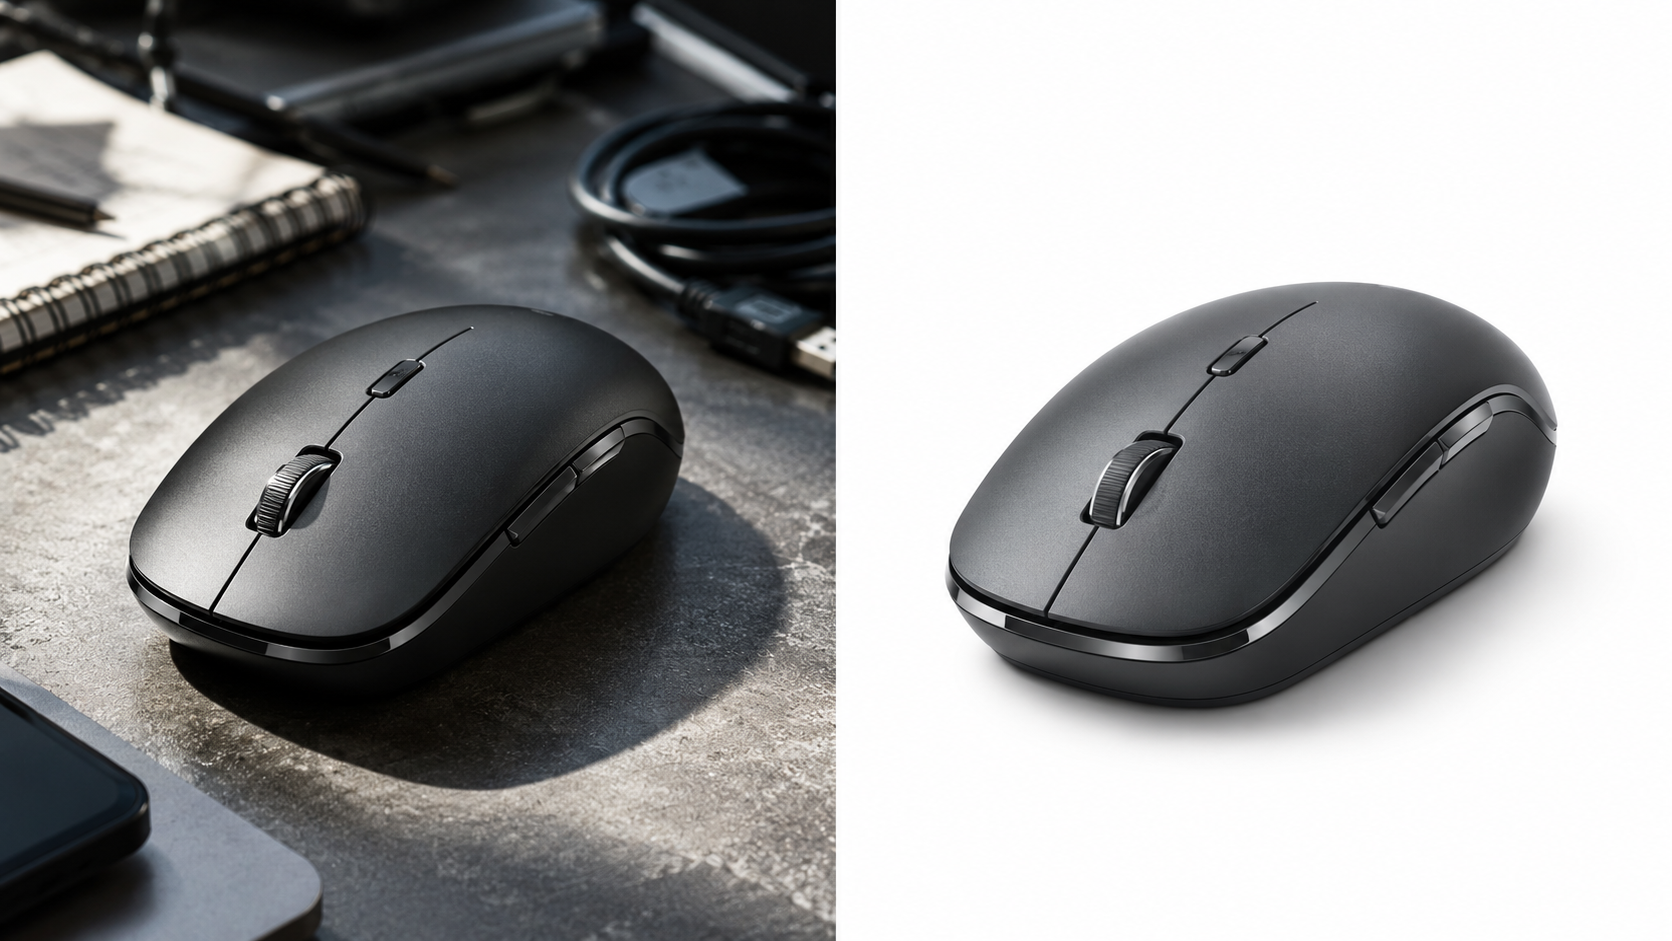
You point your phone camera at an object, snap a quick photo, and upload it to an AI image-to-3D generator expecting a clean mesh export. The result is often full of distortions: background shadows get baked into the solid 3D geometry, harsh lighting creates jagged surface noise, and perspective tilting throws off the model’s bounding box.
AI 3D mesh generators construct physical volume and surface normals directly from pixel contrast, edge gradients, and silhouette outlines. Preparing your source reference photo correctly takes under three minutes and prevents hours of manual topology cleanup.
1. Isolate the Object on a Clean, Solid Background
When an AI analyzes a photo, it attempts to separate foreground from background. If the background contains grain, tabletop textures, or competing objects, the algorithm inevitably merges those elements into phantom polygons attached to your 3D model.
- Best practice: Place the object on pure studio white (#FFFFFF) or export a PNG with a transparent alpha channel.
- Acceptable: A uniform neutral gray or soft pastel backdrop with zero texture.
- Avoid: Wooden desks, cluttered carpets, patterned walls, or overlapping desk items.
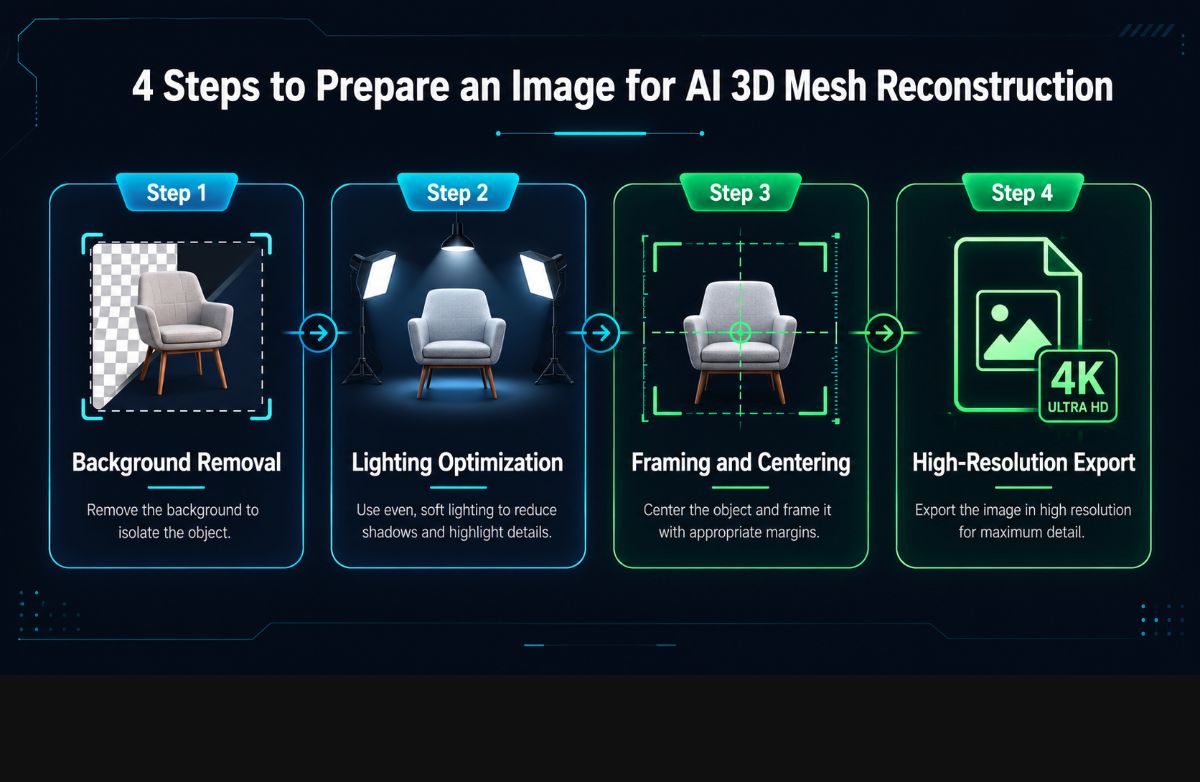
2. Balance Diffuse Lighting and Eliminate Cast Shadows
Hard directional lighting produces dark drop shadows under and behind the subject. AI photogrammetry and neural reconstruction models frequently interpret these dark shadow shapes as physical extensions of the object’s base, resulting in lumpy, deformed geometry.
- Use two or three soft, diffuse light sources from opposing 45-degree angles to cancel out hard shadows.
- Avoid harsh direct camera flash, which creates intense specular hot spots that blow out surface detail.
- Ensure the entire circumference and key profile contours of the object remain evenly illuminated.
3. Center the Subject and Straighten the Camera Angle
The AI generator normalizes your reference image inside a canonical bounding box. If the subject is tilted or off-center, the model reconstructs the mesh along an unnatural axis, distorting proportions and symmetry.
- Keep the subject centered in the frame with roughly 10% margin padding on all four edges.
- Align the camera perpendicular to the primary feature plane rather than shooting at an extreme low or high angle.
- Fill the frame efficiently without cropping out edges, handles, or small protruding components.
4. Choose the Right Resolution and Format
High-resolution inputs allow neural depth estimators to resolve fine surface seams, buttons, and material textures accurately. Downscaled or heavily compressed images lose edge contrast, resulting in smoothed-out, low-detail 3D geometry.
- Export your final reference image between 1024×1024 and 2048×2048 pixels.
- Use lossless PNG to preserve crisp silhouette edges and transparent borders.
- If using JPG, set quality to at least 95% to eliminate blocky compression noise.
Summary Reference Preparation Checklist
Before submitting any photo to your local or cloud image-to-3D workflow, run through this quick checklist: clean isolated background, shadowless diffuse lighting, centered framing with 10% margins, and uncompressed 2K PNG export. High-quality reference input guarantees clean, watertight 3D meshes ready for web, gaming, and 3D printing.
