How to Restore an Old Family Photo at Home (Scan, Upscale, Colorize)
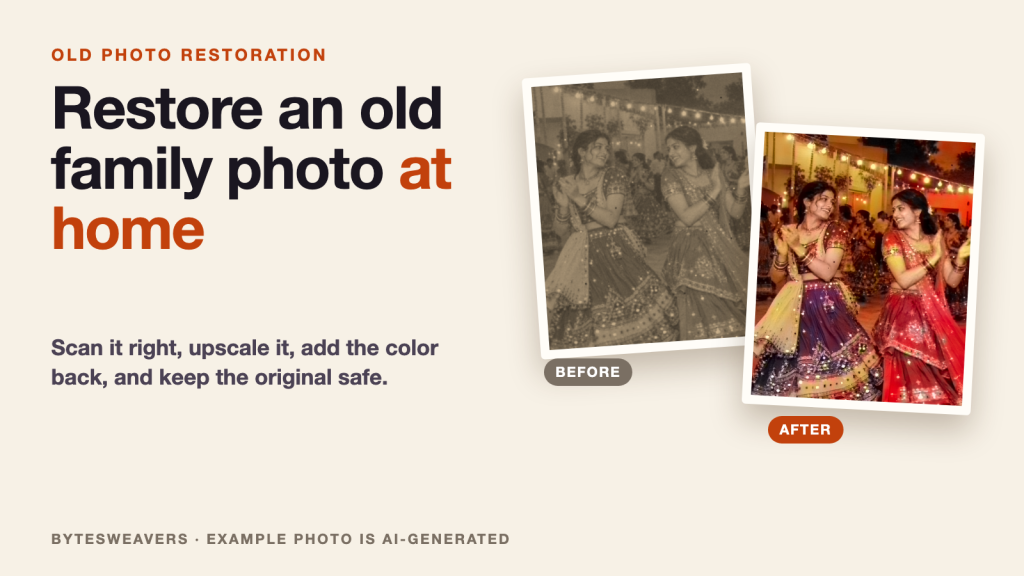
Old family prints fade, crack and curl a little more every year, and the only copy of a favorite festival photo is often sitting in a drawer or an album. The good news is that you can digitize and clean one up at home in an afternoon. This guide covers the scan, the enlargement, the color, and the step most people skip: keeping the original safe.
The example photo in this guide is AI-generated, not a real family. Upscale and color samples were made with open research models, so your own results will differ.
Step 1: Scan it properly instead of photographing it
A flatbed scanner gives you even light and no glare. A phone photo works in a pinch, but reflections off glossy paper and a slight angle both cost detail you cannot get back later. If you use a phone, shoot in daylight near a window, with the print flat on a plain surface and the phone directly above it.
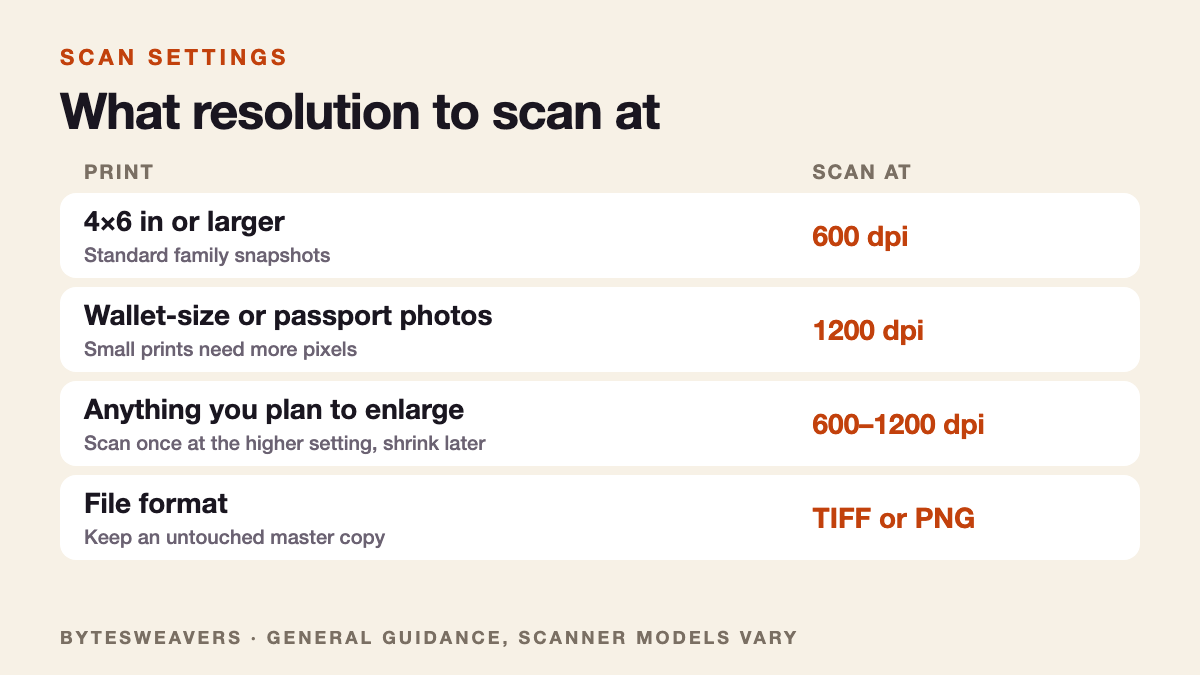
Step 2: Choose the right resolution
Scan once at a higher resolution than you think you need. You can always shrink a file later, but you cannot add real detail that was never captured.
Step 3: Keep an untouched master copy
Save the raw scan as TIFF or PNG and never edit that file. Do every enlargement, repair and color change on a duplicate. If you dislike a result, or a better tool appears in a few years, you can start again from the original scan.
Step 4: Enlarge it, and know what upscaling really does
Small scans look soft when you zoom in. An AI upscaler enlarges the image and fills in plausible detail, which usually looks sharper than a plain zoom. It is still an estimate. It cannot recover a face that was never in focus, and it can invent texture that was not in the original, so compare the result with your master before you trust it.
Step 5: Add color, but treat it as an interpretation
Neural colorizers guess what colors were likely, based on millions of other photos. Skies, grass and skin tones usually come out believable. Clothing, signs and objects are guesses, so if the exact colors matter, such as a wedding outfit, ask a relative who remembers. Save the colorized version as a separate file next to the black-and-white one.
Step 6: Name it and back it up
A photo without context is just a picture in a few decades. Put the year, place and names in the file name, or in the description field of your photo library, for example 1996-navratri-ahmedabad-mum-and-aunt.tif. Then keep at least two copies, one of them off the device, such as an external drive plus a cloud folder.
What to do with the result
Print it for the person in the photo, send it to the family group, or add it to an album. Seeing an old photo restored is often a better gift than something new, especially around a festival when families go through old albums.
Limits to keep in mind
- Heavy damage, deep creases and missing pieces need manual retouching or a restorer. Automatic tools smooth them but can leave marks.
- Upscaling and colorizing add estimated detail, so keep the original and label restored files as restored.
- Please get permission before sharing photos of other people.
Prefer a quick look? Here is the 19-second version: Old photo restoration on YouTube Shorts.
Disclosure: Bytesweavers makes offline apps that do the upscaling and color steps on iPhone and iPad: AI Photo Upscaler and Offline Photo Colorizer. The steps above also work with any scanner and any editing tool you already use.

Writes guides and product notes for Bytesweavers.