SwiftUI vs AppKit: Which Is Better for a New Mac Utility App?

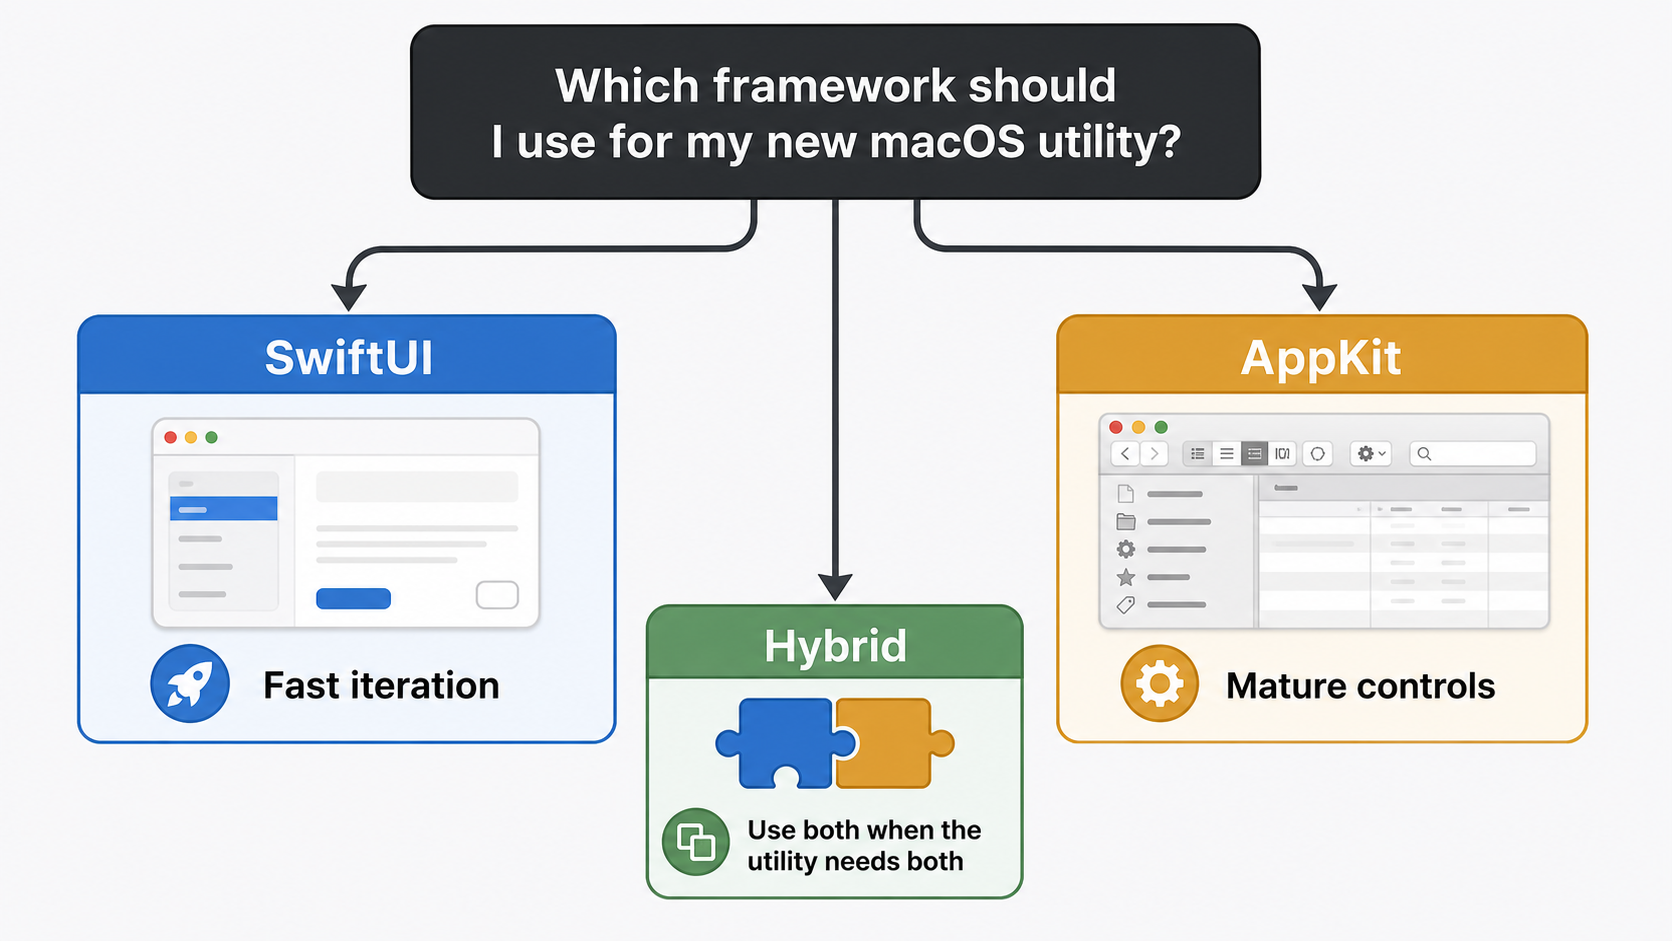
Short answer: choose SwiftUI for a new Mac utility when the interface is mostly standard screens, forms, lists, settings, and quick iteration. Choose AppKit when the utility depends on complex windows, mature macOS controls, precise menu behavior, or keyboard-heavy workflows. If the app needs both, a hybrid approach is normal: build the straightforward screens in SwiftUI and keep the difficult macOS-specific parts in AppKit. This SwiftUI vs AppKit Mac utility comparison gives you a practical starting point.
SwiftUI and AppKit are not simply “new versus old.” They encourage different ways of building a macOS interface. In a SwiftUI vs AppKit Mac utility project, SwiftUI uses a declarative description of views, controls, layout, and state. AppKit gives you direct control over windows, views, controls, events, menus, and other parts of the traditional macOS interface. The right choice depends on the utility you are actually building.
What SwiftUI and AppKit each do
SwiftUI provides views, controls, scenes, and layout structures for declaring an interface and connecting it to app data. You describe what the screen should look like for a given state, and the framework manages much of the updating when that state changes.
AppKit is the macOS framework for constructing and managing a graphical, event-driven interface. It includes the objects used for windows, panels, buttons, text fields, views, menus, and event handling. It is a good fit when the utility needs detailed control over the way macOS behaves around the interface.

Quick comparison
| Question | SwiftUI | AppKit |
|---|---|---|
| Best starting point | A new utility with standard screens and controls | A utility built around complex macOS behavior |
| Interface style | Declarative views driven by state | Explicit views, controllers, windows, and events |
| Iteration speed | Often quick for common layouts and data-driven screens | More manual work, but detailed control is close at hand |
| Window and menu control | Good for common cases; special cases may need extra work | Strong choice for complex windows, menus, panels, and commands |
| Best long-term question | Can the app stay close to standard platform patterns? | Does the app need fine-grained, Mac-specific behavior? |
When SwiftUI is the better choice
SwiftUI is a sensible first choice for a small utility with a clear data flow. Examples include a menu bar companion with a settings screen, a file renamer with a preview list, a short text converter, or a simple image helper. These apps usually have a few screens, standard controls, and state that moves from a model into the interface.
Standard screens and quick iteration
Lists, forms, navigation, settings, toolbars, and common presentations are comfortable SwiftUI territory. A view can stay close to the state it displays, which makes it easier to change a label, add a filter, or adjust the empty state without chasing updates across several controller methods.
Shared interface ideas
If you may later add an iPad version or another Apple-platform target, SwiftUI can reduce the amount of interface code that must be recreated. That does not make every platform identical. You still need to test the Mac layout, keyboard behavior, window size, and menu commands. It does make the shared parts easier to organize.
A new project with a small surface area
For a new utility, SwiftUI often lets a small team reach a usable first version quickly. You can put the time into the actual workflow instead of writing as much glue code for routine view updates. This is especially helpful when you are still testing whether the utility solves a real problem.
When AppKit is the better choice
AppKit becomes more attractive when the utility is deeply Mac-specific or when the window is the product. Think of a multi-window research tool, an editor with a complicated outline, a power-user file manager, a utility with custom table behavior, or an app with many menu commands and keyboard equivalents.
Complex windows and panels
Some utilities need several windows, panels, inspectors, split views, custom toolbars, precise first-responder behavior, or detailed control over how a window opens and closes. AppKit exposes the traditional macOS objects and event model directly, which can make these cases easier to reason about than forcing everything through a simpler abstraction.
Keyboard-first workflows
A utility used all day by experienced Mac users may depend on command validation, menu items, key equivalents, focus movement, selection behavior, and predictable responder-chain handling. AppKit is a strong option when those details are central to the experience and not just finishing touches.
Mature or highly customized controls
If the interface needs a control that behaves differently from the standard SwiftUI version, check the cost before committing. AppKit gives you a large set of mature controls and customization points. You may still write more setup code, but the required behavior can be more explicit.
Do not decide from the framework name alone
A utility can start small and grow into a difficult window-management problem. Before choosing, write down the parts that are likely to be unusual:
- How many windows and panels must stay open at once?
- Does the app need custom table, outline, text-editing, or drag-and-drop behavior?
- Are menu commands, keyboard shortcuts, and focus order part of the main workflow?
- Will the app run mostly in a menu bar, a document window, a panel, or several of these?
- Does the app need to support an additional Apple platform later?
- Which minimum macOS versions and system behaviors are required?
Then build one difficult screen as a small spike. Do not only prototype the easy settings page. The hardest screen tells you more about the framework cost than the first form or list.
When a hybrid architecture makes sense
Apple documents that AppKit works with SwiftUI, so you do not have to make the entire app obey one framework. A practical hybrid can use SwiftUI for a settings screen, onboarding flow, or simple content view while AppKit owns a specialized editor, an unusual panel, or a window with demanding keyboard behavior.
Keep the boundary deliberate. Put the shared model and business rules outside the view layer. Define a small interface for the data each side needs. If SwiftUI and AppKit views start reaching deeply into each other’s state, the hybrid can become harder to maintain than either choice alone.
Use a hybrid when it removes a real constraint. Do not add it just to say the project uses both frameworks.
SwiftUI vs AppKit: the practical choice
SwiftUI vs AppKit
For a SwiftUI vs AppKit decision, compare the hardest screen instead of choosing from framework age or habit.
A practical SwiftUI vs AppKit Mac utility decision process
- Describe the main workflow. Write the actions a person takes from launch to completion.
- Mark the unusual parts. Highlight multiple windows, custom controls, menus, keyboard commands, and system integration.
- Prototype the hardest screen. Test window behavior, state updates, focus, and the most important input method.
- Check the minimum OS target. Confirm that the APIs and behaviors you need are available for the macOS versions you support.
- Compare maintenance cost. Count the code and special cases needed to keep the screen understandable, accessible, and testable.
- Choose the smallest boundary. If one part clearly needs AppKit, isolate that part instead of moving the whole project unnecessarily.
Common mistakes
- Choosing SwiftUI because it is newer: new does not mean every complex Mac workflow is easier in it.
- Choosing AppKit because it is familiar: direct control can become a lot of setup for a simple settings utility.
- Prototyping only the easy screen: the difficult editor, table, or panel will expose the real trade-off.
- Ignoring keyboard and accessibility behavior: a utility should be tested with focus, shortcuts, VoiceOver, and different text sizes where relevant.
- Mixing frameworks without a boundary: keep model and workflow logic independent from the view technology.
Final recommendation
For most new Mac utilities with standard screens, start with SwiftUI and test the hardest workflow early. Move the specialized part to AppKit if the prototype exposes a real limitation around windows, menus, controls, or keyboard behavior. Start with AppKit when those Mac-specific details are the main reason the utility exists. In both cases, the goal of a SwiftUI vs AppKit Mac utility is a small, understandable interface that feels native and remains easy to maintain.
For more planning help, see Mac App Development and Custom App Development.
Frequently asked questions
Is SwiftUI replacing AppKit?
Not as a simple replacement rule. SwiftUI is a modern declarative framework, while AppKit remains the direct macOS interface framework. Apple supports using them together, so the choice can be made per screen or feature.
Can a SwiftUI app use AppKit controls?
Yes. A SwiftUI project can host AppKit views when a specific control or behavior needs them. Keep the bridge focused and avoid letting framework-specific details spread through the whole model layer.
Should a beginner learn AppKit first?
Learn the framework that matches the app you want to build. SwiftUI is a reasonable first step for a small, standard utility. AppKit is worth learning early when the project depends on complex windows, menus, custom controls, or keyboard-first behavior.

Writes guides and product notes for Bytesweavers.